Friday, January 20, 2012

Cowabunga ! Vintage Beach Birthday Party Ideas


I guess you could call me a frustrated wannabe party planner. I love all things themed and I have more party ideas than I do kids to throw them for so I leave these potential parties up for grabs! :D And I will admit, even though I have been born and raised in southern California..I'm just not that beachy! I'm totally a mountain girl but I still think this party would be cute for any kid. And if you choose your colors correctly it doesn't just have to be for boys. It could easily be girly or even co-ed for a party that siblings share. 
The great thing about his party is that it doesn't have to take place at the beach. As long as the weather is nice it can be done in the backyard or at a park. If you have your heart set on this theme and the weather does not agree you can totally pull this off indoors.
I saw this invitation on Etsy and it is COMPLETELY the perfect fit for what I was envisioning! It's like you stepped back into a 1960's California Dream...
I don't know about you but when I think of beach food, I think corn dogs! 
And what would be a better surf-themed drink than Hawaiian Punch? I love this old fashioned can too!

Not a fan of Hawaiian Punch you say? These are some totally cute beverage alternatives :D


I saw these beach themed treats on www.hostessblog.com and the cupcakes are an idea from Martha Stewart. HOW CUTE!!!!! 
Before you start your beach party games crank up an album from the Beach Boys..it will surely put your guests in the mood for some fun in the sun!
How low can you go? Beach Limbo Game
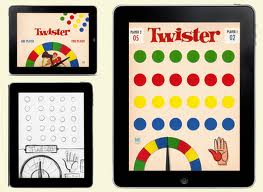
A 60's beach party would not be the same without a game of Twister!
Let the kids have a "surfing'' competition in the back yard with a Slip n Slide
And when it's time to say goodbye send all your friends away with some of these oh-so-cute and beachy favors! 
Aloha and Happy Party Planning!
Oh and here's a random afterthought for ya...how cute would it be to wear this as the hostess? 


Thursday, January 19, 2012

The Woodland Birdie Baby Shower

It was definitely a Woodland Wonderland in my house when I had the privilege of throwing a baby shower in honor of my sister and my newest niece Zoe! This baby shower got us all so excited to meet this little bundle of joy :D With her birth day fast approaching, we prepared for her arrival by thanking Jesus for the gift of her precious life, eating s'mores, and making her some truly gorgeous hair accessories..among many other things ;)


The tables were adorned with burlap table cloths and a faux bois runner (which was just cheap wood print contact paper $5 a roll at Wal Mart!) The "acorns" that fell from the trees were chocolate kisses with a Mini Nilla Wafer and a chocolate chip stem.


I also decorated Ashley's head with a giant hair bow! I couldn't resist because this is such a cute and EASY hair style :D Do I smell a hair tutorial coming on? Just maybe.... ; )
A super fun and vintage-y way to serve your beverages is old fashioned soda bottles with paper straws. This was such a treat and a cute alternative to traditional canned soda


Of course the table scape was the same theme of whimsical woodland decor, lovely little birdies perched atop rustic wire cages. Twigs and wood accented just about everything (right down to the real wood disposable forks!). The birds were clearance Christmas ornaments purchased from Crate and Barrel and Target. The wire cages can be found at Tai Pan Trading. The wire basket is from Pottery Barn (I've seen very similar styles at Kohl's as well).
The serving dishes were all scored at an amazing clearance price and I'm so happy with how well they matched. The serving platter with glass lid was purchased on clearance at Crate and Barrel, the condiment serving caddy with glass dishes was clearance from Pottery Barn and the carved wood serving bowl was clearance at Target. If you know what you are looking for when planning a party, always keep your eye out for clearance. And when you are the hostess you have these little treasures to keep for your own personal kitchen decor.
One of our side dishes was White Vine Vinaigrette Pasta Salad, a Tyler Florence recipe. This was SO easy and delish. With minimal ingredients and fresh organic veggies and bow tie pasta...there were absolutely no leftovers! 

We simply took plain Kirkland water bottles and used our faux bois contact paper to make a wood print label.


To compliment the S'mores, Cookie Dough Dip was served with Graham Crackers. Simply cream together Cream Cheese, Butter, Vanilla, white and brown sugar, toffee and chcolate chips. EASY! 


And since we were feeling all woodsy and outdoorsy...traditional baby shower cupcakes were replaced with individual S'mores.
 All the adorable food labels were created by the oh-so-crafty Diane Schaefer...many thanks Diane! 

Rosemary herb roasted turkey sandwiches with bacon were served on fresh Shepherd's bread with Muenster cheese
Pictured above that were Rosemary Lavash Pita Chips served in old fashioned brown waxed paper bags. All the bags and mini clothes pins were purchased at www.Jillybeankids.com


To jazz up plain old ice water, make one fruity and one fresh flavored water by floating strawberries or cherries in one pitcher and cucumbers in another. This was something I saw done at a spa in Palm Desert CA and I thought it was such a simple and refreshing alternative to lemon water


Ok Zoe, auntie might be coming over to borrow some of your hair clips and headbands! 

Check out Agape Live Love on Facebook to see some of Vanessa's ADORABLE vintage inspired hand-made pieces! 

One of THE CUTEST most creative ideas was orchestrated by Vanessa Workman, the owner of Agape Live Love! A hair accessory craft station where each guest crated an adorable hair piece for Zoe. Each lady put their craft in a pile and Ashley chose her favorite one. This contest was actually one of our shower games and was a totally unique way for each quest to gift Zoe with a beautiful hair accessory...and a way to save Mama lots of money since this little girlie will be SET with hair products for at least 2 years :D
This to-die-for CUTE hand made Little Birdie Taggie Blanket was given by Molly McMillan, check out her adorable stuff at Virtuous Mommy on Facebook! Absolutely adorable! 


We also had some gorgeous handmade gift bags from 31:26 (check out this lovely boutique on Facebook too!) 


I wish pictures did more justice to these amazing handmade wall letters made by Zoe's other auntie Jannae. These are just a must have for a nursery, right?!
All in all, it was just a super fun day of fellowship and fun...anticipating the arrival of sweet little Zoe! We all CAN'T WAIT to meet her!!!
Thank you to all the ladies who helped make this shower happen!
If you are planning a party or shower and have any questions about how to easily pull off the Woodland Birdie theme, products we used, recipes, or references to the businesses I listed please leave a comment and I would be happy to assist you!


Tuesday, January 17, 2012

DIY Laundry Giclee Inspired by Ballard Designs

Hi guys..long time no blog..sorry! Things have gotten pretty hectic with the beginning of the new year and also admittedly, the commencement of my Pinterest account :/ Me, distracted? Not at all! 
Well, putting Pinterest aside, here I am with another fun (the fun is actually subjective in this case, you'll see why) DIY decor idea for you :D 
The picture above from Ballard Designs is pretty much anyone's dream laundry room, right?? I say yes. I have been eyeing this beautiful laundry giclee for about a year and a half...deciding how I could justify $129 piece of beautiful art in my laundry room. Mr. P decided for me, it could not be justified. LOL. So when my friend Debbie told me she also loved the giclee, and owned a Cricut Expression...the idea seemed like an exciting new possibility ;) 
Being only $35 for a set of three, I thought these rustic safety pins were a much better deal. Instead of being patient and waiting for them to adorn my laundry room..I slapped these large lovlies above our TV nook and I thought they were a great fit. So there they will stay. Ginormous rustic safety pins don't have to be doomed to the laundry room, right? I don't think so either!
Debbie and I took a field trip to Hobby Lobby. Since Panera Bread was in the same shopping center, we were also forced to have an amazing lunch. Yes, it was a hard day indeed! 
So for this project, we each purchased a roll of Vinyl and a blank 24''x 36'' canvas. (The size of the Ballard canvas is a square 24'' x 24'' canvas which we could not find. Its possible they might be sold at Michaels or Aaron Brothers if you would prefer your giclee looks truer to the real thing. I figured the other size would work just as well for me).
The roll of Vinyl was $7 and the canvas was on sale for $8.50. Look out for a 40% off coupon to make this an even better deal.
Debbie was so kind as to cut all my letters for me. The large font for the first row was 4'' and the rest of the letters were 2''. I measured out the very fist line allowing 5 inches of space. Then a 1 inch spacer. Then 2 inches of space for my 2 inch letters. It turned out the the tall letters (such as k and h) were the only ones that actually measured a full 2 inches. So I revised my measurements to 2 inch spaces for letters and 1/2 inch for the spaces in between the letters.
After I had pencilled in all my measurements (there was a lot of trial and error going on!) I finally was able to sort out all my vinyl letter cut outs. To make the process easier, they were put into alphabetical order in coordinating piles. Punctuation marks and capital letters were separated. I got out my laptop and pulled up the Ballard Design photo as a reference. Next comes the tedious part (this took a little less than 3 hours).
Stick all your letters on in the order they go in. I ended up spacing my letters a little too far apart and instead of taking all my letters out and starting over, I just cut out a few words that weren't crucial to the definition. Yes, I'm such a cheater :P
I chose a satin spray paint from Home Depot. The color was Nutmeg. Debbie used an acrylic craft paint, the end results on both turned out pretty similar in my opinion. With the acrylic paint, the letters did bleed a bit underneath the vinyl but I actually thought it gave the sign a really awesome old printing press style, stamped look. Using the spray paint I also had some bleeding. When I took my sign outside to spray, it was VERY windy. A few of letters started to lift off. I ran into the garage with my sign so as to protect my letters and began to spray. I accidentally sprayed the wall. Shoot! Back outside :( 
The letters lifting ended up causing me some paint bleeding. Which is ok if you like that vintage stamped look...but it can also cause in-uniformity because some letters will be clean cut and others will have bleeding. In the end, that did happen to me but it really didn't look as bad as I thought and it made my sign look really unique.

Let your paint dry then begin to peel off your vinyl. Watch out for those pesky little periods, and dotted i's. 
I was able to correct some of the major bleeding spots with a Q-Tip and nail polish remover. It did do the trick, but be VERY careful because a few slip ups with make it look terrible! You also have the option of doing touch ups with white paint.
Here is my end result! For about $21 bucks I am totally happy. (It's not up in my laundry room yet because I need a shelf and a few accessories to complete my look. I plan to hang this sign over the washer, and a reclaimed barn wood shelf over the dryer. On the shelf will be some old tins, and mason jars filled with wooden clothes pins and rusty safety pins). The wind REALLY worked against me though and I came out with some bleeding in a few areas and some patches where my paint was heavier than others where the wind blew :( If you attempt this project, make sure the weather is nice and your letters are pressed on nice and tight and you should be fine. I will warn you, unless you absolutely love crafting and DIY, this project will probably make you want to kill yourself before it's over. It certainly can't be done in a day unless you have no kids and plan on not eating or showering. Unless you stay up half the night finishing. You really have to WANT to save a buck to complete this project. This project saved me about $110 plus tax and shipping which was awesome. It's up to you to decide if the savings is worth the work. 
So all in all, I'm really happy I have this sign for my laundry room! There was plenty of trial and error, corrections, tedious work, mistakes and messes made along the way. But unless an employee from Ballard Designs visits my laundry room...I don't think anyone will know the difference ;) 
Happy Crafting!